FlexUnit使用 Useing FlexUnit
Categories: Flex; Tagged with: Flex • FlexUnit; @ October 31st, 2008 0:071.下载FlexUnit
[地址:http://opensource.adobe.com/wiki/display/flexunit/Downloads] 并在应用中加入库文件:
目前版本为0.9, 下载完解压缩之后, 在Flex或AIR工程的Flex Build Path的Library Path中加入FlexUnit.swc库文件.
2. 创建测试用例
待测试的单元:
package
{
public class SimpleConverter
{
	public function SimpleConverter() {
	}

	public function convertToString(i:int):String {
		var s:String = "错误!"
		if(i == 1) {
			s = "是";
		}else {
			s = "否";
		}
		return s;
	}

}
}
测试用例:
package
{
import flexunit.framework.Assert;
import flexunit.framework.TestCase;

public class TestSimpleConverter extends TestCase
{
	public function TestSimpleConverter(methodName:String=null) {
		super(methodName);
	}

	/**
	 * 测试用例
	 */
	 public function testSimpleConverter():void {
	 	var sc:SimpleConverter = new SimpleConverter();
	 	var s:String = sc.convertToString(1);
	 	Assert.assertEquals(sc.convertToString(1), "是");
	 }
}
}
3.在应用中加入测试用例:
		import flexunit.framework.TestSuite;
		private  function onCreateComplete():void {
			var ts:TestSuite = new TestSuite();
			ts.addTest(new TestSimpleConverter("testSimpleConverter"));
			testRunner.test = ts;
			testRunner.startTest();
		}
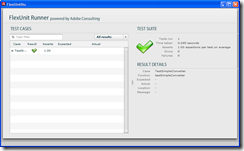
4.截图:
ActionScript中使用注释规范及ASDoc命令参数小结
Categories: Flex; Tagged with: ActionScript • ASDoc • Flex; @ October 24th, 2008 1:27在没有使用ASDoc之前, 我的注释总是乱七八糟, 并且胡说八道. 该讲的没有讲清楚, 废话比代码还多. 自从抱着试试看的态度用了一下ASDoc, 俺决定认真参照公司的代码规范, 认真规范下俺不曾被规范的注释.
ActionScript注释生成工具很多, 但俺们就使用ASDoc.
首先, 总结下ActionScript注释规范:
常用的注释:
@param
@return
@throws
@see
如:
	/**
	 * 解析给定的I18N语言字符串, 并通过fieldStringToLocalizationItem将之转换为LocalizationItem对象,放入到ArrayCollection中.
	 * @example 处理里一串I18N语言字符串
	 *
	 * stringToAC('{zh=简体中文}{zh_tw="繁体中文"}', false);
	 *
	 * @param s:String 待处理的字符串
	 * @param strict:Boolean 是否采用严格机制来处理, 默认为ture,意为如果字符串不合要求则报错; 可指定为False, 忽略错误,完成操作.
	 * @return 处理完后包含有LocalizationItem的ArrayCollection; 如果制定的字串为NULL,则返回一个空的ArrayCollection;
	 * @throws Error 如果strict为true,在检测到字符串不合要求时会throw Error.
	 * @see #fieldStringToLocalizationItem()
	 */
	public static function stringToLocalizationItems(s:String, strict:Boolean = true):ArrayCollection {
....
}
[这个文档写的很粗糙] 经过ASDoc生成后的文档如下:
 @see的用法
当需要see顶级类中的函数时
@see Array#pop(); (Method)
@see Array#length; (Property)
需要see本类某函数时,如需要see下本类的 fieldStringToLocalizationItem(fieldString:String, strict:Boolean = true)函数, 则:
@see #fieldStringToLocalizationItem().
关于@see的详细介绍: http://livedocs.adobe.com/flex/3/html/help.html?content=asdoc_7.html#188433
不足之处就是开发工具对注释的支持实在是不敢恭维.
另外总结下ASDoc里重要的配置参数
-source-path, 该path指明了源代码存放的位置
-doc-classes, 需要生成目录的类 , 在使用该变量之前必须已经声明-source-path;
如: asdoc -source-path . -doc-classes comps.GraphingWidget comps.GraphingWidgetTwo 则意味着生成当前目录下,comps\GraphingWidget .as 与comps\GraphingWidgetTwo.as的文档
-doc-sources: 指定某目录, 生成该目录及其子目录下所有.as文件的注释. 可以单独直接使用,也可以配合使用-source-path. 如:
doc-sources E:\\eclipse-jee-europa-fall2-win32_FB3\\eclipse\\workspace\\AIRTest\\com\\insprise
或配合使用:
-doc-sources com\\insprise
-source-path E:\\eclipse-jee-europa-fall2-win32_FB3\\eclipse\\workspace\\AIRTest\\com\\insprise
其他信息基本上都是无关紧要不痛不痒的一看明白.
可参照:http://liguoliang.com/2008/10/280/
通过ANT与ASDoc生成Flex文档
Categories: Flex; Tagged with: ANT • ASDoc • Flex; @ October 24th, 2008 0:33需求: 透过工程注释自动化产生文档
分析:使用ANT进行自动化配置, 使用ASDoc产生注释
在所在工程中新建一个properties文件,用以保存相关配置, 同时建立一个bulid.xml, 用以提供ANT配置文件.
具体实现:
1: 为便于管理与配置, 将ASDoc的参数放置于一个properties文件中, 在本例中我们取名叫做: asdoc.properties
含如下信息:
FLEX_HOME = E:\\eclipse-jee-europa-fall2-win32_FB3\\eclipse\\FBPlug-in301\\sdks\\3.1.0
asdoc.exe = E:\\eclipse-jee-europa-fall2-win32_FB3\\eclipse\\FBPlug-in301\\sdks\\3.1.0\\bin\\asdoc.exe
dir.docSource = com\\insprise\\localizationeditor
dir.src = .
dir.output = E:\\eclipse-jee-europa-fall2-win32_FB3\\eclipse\\workspace\\AIRTest\\doc
main.title = Test
window.title = test
footer = Insprise Software
以上提供了ASDoc的路径, 源文件的目录, 文档输出目录, 以及文档的网页标题, 文档内标题, 文档页脚等信息.
2: Build.xml配置: [因代码高亮代码有误,导致bulid.xml显示有误,请参照网页源代码自行修正]
ANT运行build.xml之后,将会自动生成文档到输出目录.
ASDoc具体的参数配置可参见:http://liguoliang.com/2008/10/286/
当ANT编译成功后,会出现如下提示[这个是在Eclipse中使用ANT编译后的输出信息]:
Buildfile: E:\eclipse-jee-europa-fall2-win32_FB3\eclipse\workspace\AIRTest\src\build.xml
clean_Old_Docs:
[delete] Deleting directory E:\eclipse-jee-europa-fall2-win32_FB3\eclipse\workspace\AIRTest\doc
[mkdir] Created dir: E:\eclipse-jee-europa-fall2-win32_FB3\eclipse\workspace\AIRTest\doc
create_Docs:
[exec] Loading configuration file E:\eclipse-jee-europa-fall2-win32_FB3\eclipse\FBPlug-in301\sdks\3.1.0\frameworks\flex-config.xml
[exec] Documentation was created in E:\eclipse-jee-europa-fall2-win32_FB3\eclipse\workspace\AIRTest\doc\
main:
BUILD SUCCESSFUL
Total time: 26 seconds
ActionScript实现顺序查找,二分查找
Categories: Flex; Tagged with: ActionScript • Flex • 查找 • 算法; @ October 19th, 2008 16:48写的比较潦草,欢迎指正….批评是我前进的动力……
顺序查找实现 Sequential Search
/**
* 顺序查找实现 Sequential Search
*/
public static function sequentialSearch(k:int, a:Array):int {
var index:int = -1;
for(var i:int = 0; i
二分查找实现
/**
* 二分查找实现
*/
public static function binarySearch(k:int, a:Array):int {
var startIndex:int = 0;
var endIndex:int = a.length - 1;
var midIndex:int;
var index:int = -1;
while(startIndex <= endIndex) {
midIndex = int((startIndex + endIndex)/2);
if(k > a[midIndex]) {
startIndex = midIndex + 1;
}else {
endIndex = midIndex - 1;
}
if(k == a[midIndex]) {
index = midIndex;
}
}//end of while
return index;
}//end of function binarySearch
ActionScript实现插入排序[直接插入排序 Insertion Sort],交互排序排序[单向双向冒泡排序 Bubble Sort]
Categories: Flex; Tagged with: ActionScript • Flex • 排序 • 算法; @ October 19th, 2008 16:41上学时数据结构就一直没学好, 死皮赖脸连抄带蒙, 补考时才考过. 早知道现如今脑子不够使, 那时候一定好好学….
排序的算法比较多,大概可分为:
* 插入排序
* 冒泡排序
* 选择排序
* 快速排序
* 堆排序
* 归并排序
* 基数排序
* 希尔排序
在这我就找俩最简单的练练手先, 写的不一定对, 欢迎指正, 批评才是我前进的动力…
直接插入排序 Insertion Sort
}
/**
* 插入排序[直接插入排序 Insertion Sort]
*/
public static function insertionSort(arrayToBeSorted:Array):void {
for(var i:int = 0; i0; j--) {
if(arrayToBeSorted[j-1]>arrayToBeSorted[i]) {
arrayToBeSorted[j] = arrayToBeSorted[j-1];
}else {
break;
}
trace(j);
}
arrayToBeSorted[j] = temp;
}
trace(arrayToBeSorted);
}
交互排序[冒泡排序 Bubble Sort]
/**
* 交互排序[冒泡排序 Bubble Sort]
*/
public static function bubbleSort(arraytoBeSorted:Array):void {
var startIndex:int = 0;
var tempIndex:int;
for(var j:int = arraytoBeSorted.length - 1; j>0; j--) {
for(var i:int = arraytoBeSorted.length - 1; i>startIndex; i--) {
if(arraytoBeSorted[i-1]>arraytoBeSorted[i]) {
//swap(arraytoBeSorted[i], arraytoBeSorted[i-1]);
var temp:int = arraytoBeSorted[i];
arraytoBeSorted[i] = arraytoBeSorted[i-1];
arraytoBeSorted[i-1] = temp;
tempIndex = i;
}
}//end of for
startIndex = tempIndex;
trace("StartIndex: " + startIndex);
trace("冒泡法排序结果: " + arraytoBeSorted);
}//end of for
}
双向冒泡:
/**
* 交互排序[双向冒泡]
*/
public static function doubleDirectionBubbleSort(arrayToBeSorted:Array):void {
var j:int;
var k:int;
var tempIndex:int = arrayToBeSorted.length;
var startIndex:int = 0;
var endIndex:int = arrayToBeSorted.length - 1;
var change:Boolean = true;
while(startIndexstartIndex; j--) {
change = false;
if(arrayToBeSorted[j]arrayToBeSorted[k]) {
var temp:int = arrayToBeSorted[k];
arrayToBeSorted[k] = arrayToBeSorted[k-1];
arrayToBeSorted[k-1] = temp;
change = true;
}
tempIndex = k;
trace("重的下沉: " + arrayToBeSorted +" Changed: " + change.toString() + " StrtIndex: " + startIndex + " EndIndex:" + k);
}//end of for
endIndex = tempIndex;
trace("startIndex: " + startIndex + " endIndex: " + endIndex);
trace("双向冒泡排序后: " + arrayToBeSorted);
}//end of while
}//end of function
