Let the Flex thread sleep for a while
Categories: Flex; Tagged with: ActionScript • Flex; @ July 15th, 2011 22:26Sometimes we use thread.sleep to let the thread stop running for a while in Java, but in Flex, we can’t control the thread, but sometimes we want to let the method sleeping, and here is what I’ll do:
public class SleepUtils
{
	// Constructor
	public function SleepUtils() {
	}

	/**
	 * Let the thread sleep.
	 * @param ms Million seconds you want to sleep.
	 *
	 */
	public static function startSleep(ms:Number):void {
		var timeBegin:Date = new Date();
		trace("Sleep begin: " + timeBegin.toTimeString());
		while((new Date()).getTime() - timeBegin.getTime() < ms) {
		}
		trace("Sleep end: " + new Date().toTimeString());
	}

} // End of class
Flex Event stopimmediatepropagation VS stoppropagation
Categories: Flex; Tagged with: ActionScript • Event • Flex; @ June 17th, 2011 17:35What’s the difference ? Here is the test codes:
We will create a button in a Group, and listen the button click event(MouseEvent.Click):
		protected function windowedapplication1_creationCompleteHandler(event:FlexEvent):void {
			//  Create button and container
			var hbox:HGroup = new HGroup();
			var button:Button = new Button();
			button.label = "Button";

			// Add Eventer litener
			button.addEventListener(MouseEvent.CLICK, onButtonClick1);
			button.addEventListener(MouseEvent.CLICK, onButtonClick2);
			hbox.addEventListener(MouseEvent.CLICK, onButtonClick3);

			hbox.addElement(button);
			addElement(hbox);
		}

			// Button click handler 1
			private function onButtonClick1(e:MouseEvent):void {
				e.stopImmediatePropagation(); // or e.stopPropagation();
				trace("Handler 1");
			}

			// Button click handler 2
			private function onButtonClick2(e:MouseEvent):void {
				trace("Handler 2");
			}

			// Button click handler 3 listened by hbox
			private function onButtonClick3(e:MouseEvent):void {
				trace("Handler 3");
			}
Here is the difference:
when use stop propagation in the handler 1st, the trace is:
Handler 1
Handler 2
but when use stopImmediatePropagation(), the trace is:
Handler 1
That’s pretty easy to find the differences:
“The stopImmediatePropagation() method also prevents the Event objects from moving on to the next node, but it does not allow any other event listeners on the current node to execute.” (Adobe livedocs)
Flex ArgumentError: Error #2173: Unable to read object in stream
Categories: Flex; Tagged with: Flex; @ April 23rd, 2011 23:04Class写的没有问题, 实现了IExternalizable 接口, 但总是报错:
ArgumentError: Error #2173: Unable to read object in stream. The class com.liguoliang.helloworld.Department does not implement flash.utils.IExternalizable but is aliased to an externalizable class.
at ObjectInput/readObject()
at mx.collections::ArrayList/readExternal()[E:\dev\4.0.0\frameworks\projects\framework\src\mx\collections\ArrayList.as:586]
at mx.collections::ArrayCollection/readExternal()[E:\dev\4.0.0\frameworks\projects\framework\src\mx\collections\ArrayCollection.as:147]
at ObjectInput/readObject()
at mx.messaging.messages::AbstractMessage/readExternal()[E:\dev\4.0.0\frameworks\projects\rpc\src\mx\messaging\messages\AbstractMessage.as:486]
at mx.messaging.messages::AsyncMessage/readExternal()[E:\dev\4.0.0\frameworks\projects\rpc\src\mx\messaging\messages\AsyncMessage.as:170]
at mx.messaging.messages::AcknowledgeMessage/readExternal()[E:\dev\4.0.0\frameworks\projects\rpc\src\mx\messaging\messages\AcknowledgeMessage.as:95]
找来找去找不到原因, 后来发现在App中根本没有使用过这个类! 很久没开发Flex, 把这么个事给忘了… 个人感觉应该报Class not found的错啊 🙁
对于没有使用过的类, 可以在App中引用一下, 确保在编译时不要被忽略:
			// 本例中未试过用Department类, 仅作引用;
			private static function __ref():void {
				Department;
			}
基于Athena framework快速创建Java Flex应用入门教程
Categories: Flex • Java; Tagged with: Athena Framework • BlazeDS • Flex • Flex企业级框架 • Java; @ April 23rd, 2011 22:05本教程简要介绍基于Athena框架的Flex应用开发. 假定你已具备基本的Flex + Java开发技能. 我们将使用Athena框架快速创建一个类似与Adobe Flex Test Drive的小应用(链接), 该应用与Adobe Flex Test Drive的不同之处在于: Flex端采用了Athena Framework, 并基于Athena Framework增加了服务器端的支持.
由于时间有限, 本例仅展示环境配置, 基于Athena Console管理数据结构并自动生成Java, Flex代码, 通过简单编程实现基本功能.
所有的代码均可通过: http://code.google.com/p/athenahelloworld/ checkout(不含lib).
本文分三部分:
- 基于Athena框架的Flex入门教程(1) 环境配置
- 基于Athena框架的Flex入门教程(2)配置Entity, 自动生成Java端, Flex端代码
- 基于Athena框架的Flex入门教程(3) 编写Java Flex两端代码,运行程序
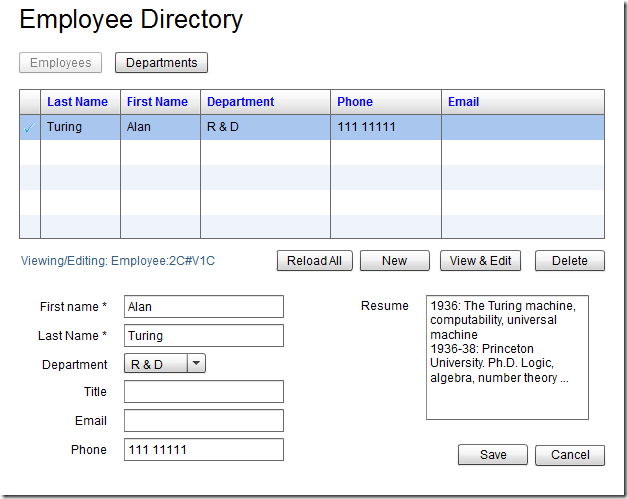
下图为Athena framework官方提供的Test Drive最后效果图, 可进行Employ的CRUD, 并列出Department的所有employ.
基于Athena框架的Flex入门教程(3) 编写Java Flex两端代码,运行程序
Categories: Flex • Java; Tagged with: Athena Framework • BlazeDS • Flex • Java; @ April 23rd, 2011 20:04在教程1中已经创建好了Java工程及Flex工程;
在教程2中已经使用AthenaConsole及metadata workbench配置好了数据库,并进行了建模及代码生成;
本节我们将编写Java端及Flex端代码, 并最终运行程序;
服务器端编程 – 创建被配置Service
在Athena框架下, Flex可以直接呼叫Java端的Service. 除了Service Class本身之外, 还需要在xml文件中声明该类, 以便Flex端呼叫使用.
创建Service – DeptService.java
Athena框架下的ServiceClass负责响应Flex端的请求, 与数据库进行交互. 我们可继承org.athenasource.framework.eo.web.service.AbstractService类以快速创建Service.
package com.liguoliang.helloworld.service;

import java.util.List;

import org.athenasource.framework.eo.core.EOContext;
import org.athenasource.framework.eo.query.EJBQLSelect;
import org.athenasource.framework.eo.web.service.AbstractService;

public class DeptService extends AbstractService {

	/**
	 * 加载Department列表
	 * @return
	 */
	public List<Object> loadDepts() {
		EOContext eoContext = createEOContext(); // 创建Athena EoContext;

		String strEJBQL = "SELECT dept FROM Department dept"; // 加载所有Department;
		EJBQLSelect select = eoContext.createSelectQuery(strEJBQL);

		return select.getResultList(); // 执行EJBQL, 并返回所有数据;
	}
}
在Service配置文件中声明Service
为了便于Flex端呼叫Service, 我们需要事先创建eo-services.xml配置文件, 该文件位于: WEB-INFO 根目录下, 该目录下有我们在教程1中介绍的eo-config.xml, flex-services.config.xml文件.
我们需要创一个专门存放Service的xml文件: eo-services.xml, 该文件的样例请参考官方文档, 我们增加刚才创建的DeptService:
<service class=”com.liguoliang.helloworld.service.DeptService;” name=”deptService” description=”AthenaFramework HelloWorld” />
Java端工程目录见文末附图;
至此, 我们已经创建并配置好了DeptService, 万事俱备, 只等Flex端来Call了!
Flex端编程
在Flex端工程中需要将athena-flx-2.0.0.swc放入labs目录.
将在Application创建完毕后立即初始化EoService, 基于EoService可呼叫Java端定义的Service.
			import com.liguoliang.helloworld.Department;

			import mx.collections.ArrayCollection;
			import mx.controls.Alert;
			import mx.events.FlexEvent;

			import org.athenasource.framework.eo.core.EOService;
			import org.athenasource.framework.eo.core.ioc.EOServiceLocator;
			import org.athenasource.framework.eo.remoting.event.EventEOService;
			import org.athenasource.framework.eo.remoting.event.EventRemoteOperationError;
			import org.athenasource.framework.eo.remoting.event.EventRemoteOperationSuccess;

			/** EOService */
			protected var eoService:EOService;

			/**
			 * 创建完毕后响应, 初始化EOService(将会加载Metadata基础数据)
			 */
			protected function onCreationComplete(event:FlexEvent):void {
				// Initialize eoService
				eoService = new EOService("http://localhost:8080/AthenaHelloWorld/messagebroker/amf", "eo", 2, true, onEoServiceEvent);
				// Set Service Locator
				EOServiceLocator.getInstance().eoService = eoService;
			}

			/**
			 * EoService初始化完毕, 如果成功则立即加载Department列表.
			 */
			protected function onEoServiceEvent(event:EventEOService):void {
				if(event.kind == EventEOService.KIND_LOGIN_SUCCESS) {
					trace("Metadata 加载成功");
					loadDepts(); // 加载列表
				}else if(event.kind == EventEOService.KIND_LOGIN_ERROR || event.kind == EventEOService.KIND_META_LOAD_ERROR) {
					Alert.show("ERROR: " + event.errorMessage);
				}
			}

			// 加载Department列表 - EoService已初始化完毕, 在任意位置使用EOServiceLocator.getInstance().eoService即可拿到eoService实例;
			// 使用eoService呼叫Java端创建的Service.
			private function loadDepts():void {
				// 注意首个参数serviceName - 需要与Java端eo-service.xml中配置的Service name相同.
				EOServiceLocator.getInstance().eoService.invokeService("deptService", "loadDepts", [], onLoadDeptsSuccess, onLoadDeptsError);
			}

			// 加载成功后响应.
			private function onLoadDeptsSuccess(e:EventRemoteOperationSuccess):void {
				var deptsAC:ArrayCollection = e.data as ArrayCollection;
				trace("加载到的Dept列表长度: " + deptsAC.length);
				datagirdDepts.dataProvider = deptsAC; // deptsAC中数据为Department类的实例.
			}

			private function onLoadDeptsError(e:EventRemoteOperationError):void {
				Alert.show(e.exceptionDetails, "加载失败!");
			}
启动Java服务器, 运行Flex应用
枯燥的配置只是为了更简单流畅的开发, 终于到了真正运行的时刻了
(在运行之前, 为了方便演示, 我已在数据库中插入了两条测试记录)
- 启动Java端服务器
- 运行Flex端应用
运行成功:
服务器端都做了什么? EJBQL被翻译成了什么SQL?
可通过配置Java端src根目录下log4j.properties文件以查看更多debug信息(如不存在请创建)
[http-8080-1] INFO uery.EJBQLSelect – EJBQL: SELECT dept FROM Department dept
[http-8080-1] INFO uery.EJBQLSelect – SQL: SELECT dept.department_ID, dept.version, dept.status, dept.ORG_ID, dept.deptName FROM Department dept WHERE dept.status <> 4
下载本例代码 & 走的更远
本例代码可通过Google code checkout: http://code.google.com/p/athenahelloworld/
其中包含: Java, Flex工程文件(均不含lib), 数据库sql文件(包含在Java工程中),
可下载Athena framework官方示例程序进一步体验: http://athenasource.org/flex/basic-tutorial.php
附录: helloworld最终目录结构:


