AIR中窗口的关闭
Categories: Flex; Tagged with: AIR; @ October 21st, 2008 10:00在默认情况下, AIR程序中已经被关闭的窗口不可以再次打开的.因此我们通过visible属性 来模拟打开关闭[ 没有关闭, 只是隐藏]:
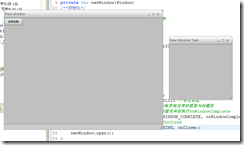
以下代码新建了一个窗口, 并监听Event.CLOSING事件, 阻止默认行为, 使得用户在点击关闭窗口时,窗口只隐藏而不关闭, 当用户再次点击主窗口的”OPEN”时, 该新窗口又会出现,.
import mx.messaging.AbstractConsumer;
import mx.events.AIREvent;
import mx.controls.Button;
import mx.core.Window;
private var newWindow:Window;
/**初始化*/
private function init():void {
title = "Main Window"; //设定标题栏显示的名称
addNewWindow();	//增加一个新窗口
//增加一个Button
var buttonOpen:Button = new Button();
buttonOpen.label = "OPEN";
buttonOpen.addEventListener(MouseEvent.CLICK, onOpenButtonClicked);
addChild(buttonOpen);
}

/**创建新窗口并打开*/
private function addNewWindow():void {
	newWindow = new Window();
	newWindow.width = 200;
	newWindow.height = 200;
	newWindow.title = "New Winidow Test";
	newWindow.type = NativeWindowType.UTILITY //设定类型
	newWindow.systemChrome = "none"; //去除系统自带的框架与标题栏
	//监听AIREvent.WINDOW_COMPLETE函数,当创建完毕后执行onWindowComplete
	newWindow.addEventListener(AIREvent.WINDOW_COMPLETE, onWindowComplete);
	//监听Event.CLOSING,当用户点击关闭时,呼叫onClose
	newWindow.addEventListener(Event.CLOSING, onClose);
	newWindow.open();
}

/**创建完毕后的响应函数, 用于设定新窗口的位置*/
private function onWindowComplete(e:AIREvent):void {
	e.target.stage.nativeWindow.x = (Capabilities.screenResolutionX -  e.target.stage.nativeWindow.width)/2;
	e.target.stage.nativeWindow.y = (Capabilities.screenResolutionY - e.target.stage.nativeWindow.height)/2;
}

/**当主窗口的"OPEN"点击后,执行该函数,将新窗口重新设置为active,看起来便是关闭后,点击"OPEN"将新窗口从新打开*/
private function onOpenButtonClicked(e:MouseEvent):void {
	newWindow.activate();
}

/**当点击关闭后,将窗口设为不可见,同时阻止默认行为的发生*/
private function onClose(e:Event):void {
	e.preventDefault();
	newWindow.visible = false;
}
在一个MXML初始化时执行以上代码,变可出现以下结果:
点击新窗口关闭按钮时, 新窗口仅仅隐藏起来, 点击主窗口的”OPEN”时,将使得新窗口重新Active.
提示:
1.要监听Event.CLOSING事件, 不要搞成Event.CLOSE事件了….[最近表达能力有点小欠缺, 描述不清楚, 只好用”搞”]…
2. 主窗口不使用系统自带的框架与标题栏, 须在配置文件中设定 详见上一篇文章… 新窗口使用newWindow.systemChrome = “none”; 便可完成该效果.
略微总结下Air工程中的xml配置[描述]文件
Categories: Flex; Tagged with: AIR; @ October 20th, 2008 23:55在Flex Builder中新建一个Air工程会自动产生一个对应的配置文件,[也许叫做描述文件会更加确切], 如新建一个名为"AIRTest"的工程, 则会产生一个"AIRTest-app.xml"的配置文件. 本文略加总结, 以稍事整理下自己有点小杂乱的思路:
当你在打包发布Air工程时, 就会用到该文件来提供一些信息. 这些信息包括但不限於: 该程序的一个唯一的ID, 版本, 安装时的显示信息等.
捡几个重要的说说:
1. [必须]application标签: 必须的, 是该配置文件的Root, 对于Air 1.1来说, 命名空间为:http://ns.adobe.com/air/application/1.1", 每一个版本的Air都有一个单独的命名空间. 其他的标签作为子标签嵌入在application中.
2.[必须]id标签: 指定该程序一个唯一的ID, 只有带有ID属性的Air程序才能被安装,.程序的ID由发布者的ID与id标签中指定的id组合而成.
3.[必须]filename标签: 指定生成的.air文件的名称
4.[可选]name标签: 用于指定AIR程序安装的默认目录, 当程序运行时第一屏显示中标题栏现实的标题, 如果不指定name的属性, 则使用filename代替.
5.[必须]version 标签: Air不会对version进行任何干预或是操作, 完全由用户来控制,因此可以使用任何String来做为Verion, 如 1.0 , 2.5.1, 4.0a等
6.[可选]description: 安装时显示的描述
7.[可选]copyright: 版权信息
8.[必须]initialWindow标签: initialWindow标签属性为AIR程序指定实质性的内容, initialWindow下面有很多子标签, 但只有content是必须的. content用来描述AIR程序必须的.swf或.html文件.
[可选]systemChrome标签: 是否使用系统提供的框架与标题栏, 默认值为"standard", 如果需要AIR程序去掉操作系统自带的标题栏等, 设置为"none"便可.
[可选]transparent: 设定程序是否透明, 默认值为true, 但首要条件是systemChrome设置为none
[可选]visible: 初始化时是否可见.. 在你调整好程序的定位或是其他属性之后, 可以通过代码再设置为ture.
[可选]minimizable, maximizable, resizable, 是否可以最小化,最大化, 调整大小. 默认都为true.
[可选]width, height, 窗口的大小
[可选]x,y: 程序的定位,左上角
[可选]minSize, maxSize: 程序最小化,最大化后的窗口大小: 如: 400 200;
9. [可选]installFolder: 我们无法更改程序安装默认主目录[在Windows下, 为系统盘下的\Program Files], 只能通过installFolder设置该默认主目录下的子目录.
10.[可选]programMenuFolder 程序安装成功后, 在Windows开始菜单 所有程序中的文件夹; 在其他操作系统中将忽略该属性
11. [可选]icon 定义在桌面快捷方式, 快速启动栏, 缩略图等模式下的图像
12. [可选]customUpdateUI 设置为false时由AIR application installer来自动进行升级,无须用户干预, 设置为true时, 将弹出标准的AIR更新对话框.
13.[可选]allowBrowserInvocation: 是否允许用户通过浏览器中的连接来访问AIR程序. 默认为false
14.[可选] fileTypes: 注册AIR程序打开的某类文件.
Air中新建窗口 Create New Window In Air
Categories: Flex; Tagged with: AIR; @ October 20th, 2008 17:16问题:在Air中新建一个窗口
代码实现:
在app初始化时执行以下函数,将新建并添加一个名为"New Winidow Test",长宽分别为200的窗口:
private function init():void {
	newWindow = new Window();
	newWindow.width = 200;
	newWindow.height = 200;
	newWindow.title = "New Winidow Test";
	newWindow.systemChrome = "none";
	newWindow.type = NativeWindowType.UTILITY
	newWindow.open();
}
如果需要设定该窗口的显示位置, 可通过监听AIREvent.WINDOW_COMPLETE事件来进行x,y的设定.
ActionScript实现顺序查找,二分查找
Categories: Flex; Tagged with: ActionScript • Flex • 查找 • 算法; @ October 19th, 2008 16:48写的比较潦草,欢迎指正….批评是我前进的动力……
顺序查找实现 Sequential Search
/**
* 顺序查找实现 Sequential Search
*/
public static function sequentialSearch(k:int, a:Array):int {
var index:int = -1;
for(var i:int = 0; i
二分查找实现
/**
* 二分查找实现
*/
public static function binarySearch(k:int, a:Array):int {
var startIndex:int = 0;
var endIndex:int = a.length - 1;
var midIndex:int;
var index:int = -1;
while(startIndex <= endIndex) {
midIndex = int((startIndex + endIndex)/2);
if(k > a[midIndex]) {
startIndex = midIndex + 1;
}else {
endIndex = midIndex - 1;
}
if(k == a[midIndex]) {
index = midIndex;
}
}//end of while
return index;
}//end of function binarySearch
ActionScript实现插入排序[直接插入排序 Insertion Sort],交互排序排序[单向双向冒泡排序 Bubble Sort]
Categories: Flex; Tagged with: ActionScript • Flex • 排序 • 算法; @ October 19th, 2008 16:41上学时数据结构就一直没学好, 死皮赖脸连抄带蒙, 补考时才考过. 早知道现如今脑子不够使, 那时候一定好好学….
排序的算法比较多,大概可分为:
* 插入排序
* 冒泡排序
* 选择排序
* 快速排序
* 堆排序
* 归并排序
* 基数排序
* 希尔排序
在这我就找俩最简单的练练手先, 写的不一定对, 欢迎指正, 批评才是我前进的动力…
直接插入排序 Insertion Sort
}
/**
* 插入排序[直接插入排序 Insertion Sort]
*/
public static function insertionSort(arrayToBeSorted:Array):void {
for(var i:int = 0; i0; j--) {
if(arrayToBeSorted[j-1]>arrayToBeSorted[i]) {
arrayToBeSorted[j] = arrayToBeSorted[j-1];
}else {
break;
}
trace(j);
}
arrayToBeSorted[j] = temp;
}
trace(arrayToBeSorted);
}
交互排序[冒泡排序 Bubble Sort]
/**
* 交互排序[冒泡排序 Bubble Sort]
*/
public static function bubbleSort(arraytoBeSorted:Array):void {
var startIndex:int = 0;
var tempIndex:int;
for(var j:int = arraytoBeSorted.length - 1; j>0; j--) {
for(var i:int = arraytoBeSorted.length - 1; i>startIndex; i--) {
if(arraytoBeSorted[i-1]>arraytoBeSorted[i]) {
//swap(arraytoBeSorted[i], arraytoBeSorted[i-1]);
var temp:int = arraytoBeSorted[i];
arraytoBeSorted[i] = arraytoBeSorted[i-1];
arraytoBeSorted[i-1] = temp;
tempIndex = i;
}
}//end of for
startIndex = tempIndex;
trace("StartIndex: " + startIndex);
trace("冒泡法排序结果: " + arraytoBeSorted);
}//end of for
}
双向冒泡:
/**
* 交互排序[双向冒泡]
*/
public static function doubleDirectionBubbleSort(arrayToBeSorted:Array):void {
var j:int;
var k:int;
var tempIndex:int = arrayToBeSorted.length;
var startIndex:int = 0;
var endIndex:int = arrayToBeSorted.length - 1;
var change:Boolean = true;
while(startIndexstartIndex; j--) {
change = false;
if(arrayToBeSorted[j]arrayToBeSorted[k]) {
var temp:int = arrayToBeSorted[k];
arrayToBeSorted[k] = arrayToBeSorted[k-1];
arrayToBeSorted[k-1] = temp;
change = true;
}
tempIndex = k;
trace("重的下沉: " + arrayToBeSorted +" Changed: " + change.toString() + " StrtIndex: " + startIndex + " EndIndex:" + k);
}//end of for
endIndex = tempIndex;
trace("startIndex: " + startIndex + " endIndex: " + endIndex);
trace("双向冒泡排序后: " + arrayToBeSorted);
}//end of while
}//end of function
